
Warning: Undefined array key 3 in /home/naoooooo8/naoya-ono.com/public_html/blog/wp-content/themes/sango-theme-poripu/library/functions/prp_content.php on line 18
Warning: Undefined array key 4 in /home/naoooooo8/naoya-ono.com/public_html/blog/wp-content/themes/sango-theme-poripu/library/functions/prp_content.php on line 21
Warning: Undefined array key 3 in /home/naoooooo8/naoya-ono.com/public_html/blog/wp-content/themes/sango-theme-poripu/library/functions/prp_content.php on line 30
Warning: Undefined array key 4 in /home/naoooooo8/naoya-ono.com/public_html/blog/wp-content/themes/sango-theme-poripu/library/functions/prp_content.php on line 33
書き方
UIの変数名.layer.cornerRadius = 数値(どのぐらい角を丸くするか)例
ボタンを丸くする
import UIKit

class ViewController: UIViewController {

// ボタンの変数
@IBOutlet weak var sampleButton: UIButton!

  override func viewDidLoad() {
    super.viewDidLoad()

    //ボタンの角を丸くする
    sampleButton.layer.cornerRadius = 25
  }
}
シミュレーターで確認するとこんな感じです。
storyboard上は変化がないですが、シミュレーターではボタンの角が丸まっていることが確認できます。
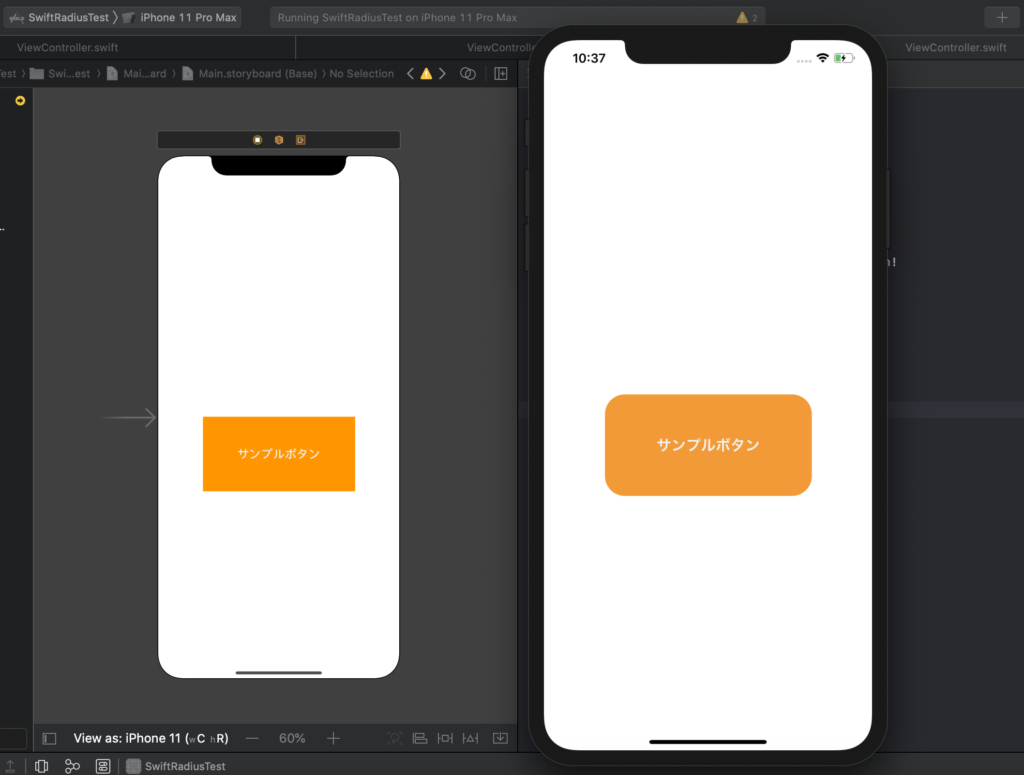
上の例はボタンですが、画像とか他のUIも同様にして丸くすることが可能です。
ボタンが丸くならない場合
ボタンに画像が設定されているなど、条件によってcornerRadiusの設定が反映されないことがあります。
その場合、以下のコードを追加すればOKです。
    // 追加
    sampleButton.layer.masksToBounds = true