TextビューはUILabelに相当するもので、名前の通りテキスト(文字列)を表示する時に使います。
このページでは、このTextの基本的な使い方について紹介します。
基本の書き方
struct ContentView: View {
    var body: some View {
        Text("Hello, World!")
    }
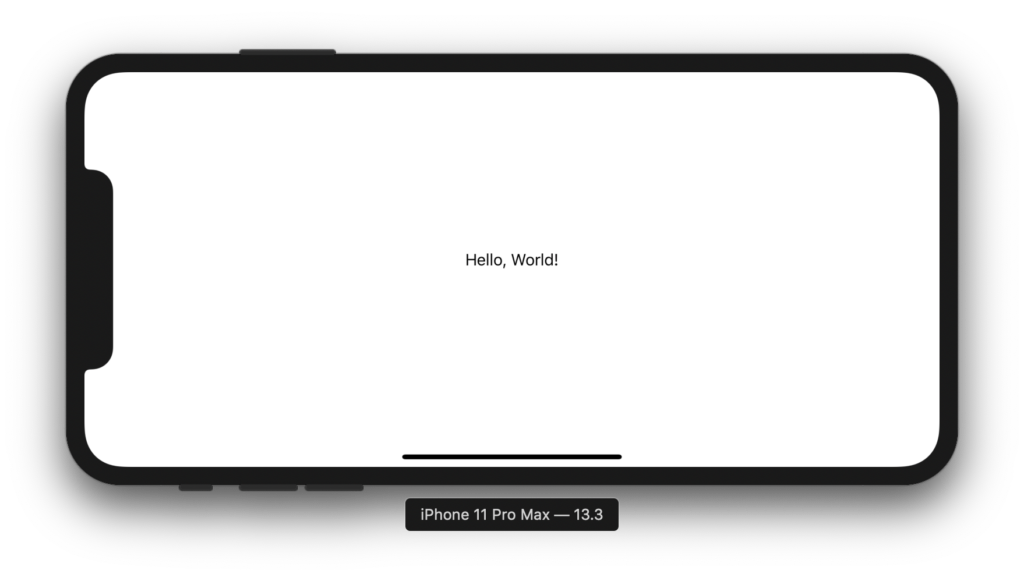
}Text()に文字列を記述することで、テキストを表示することができます。
フォントサイズの変更
.font(.定義済みのフォントサイズ)font()を使ってフォントサイズを指定します。
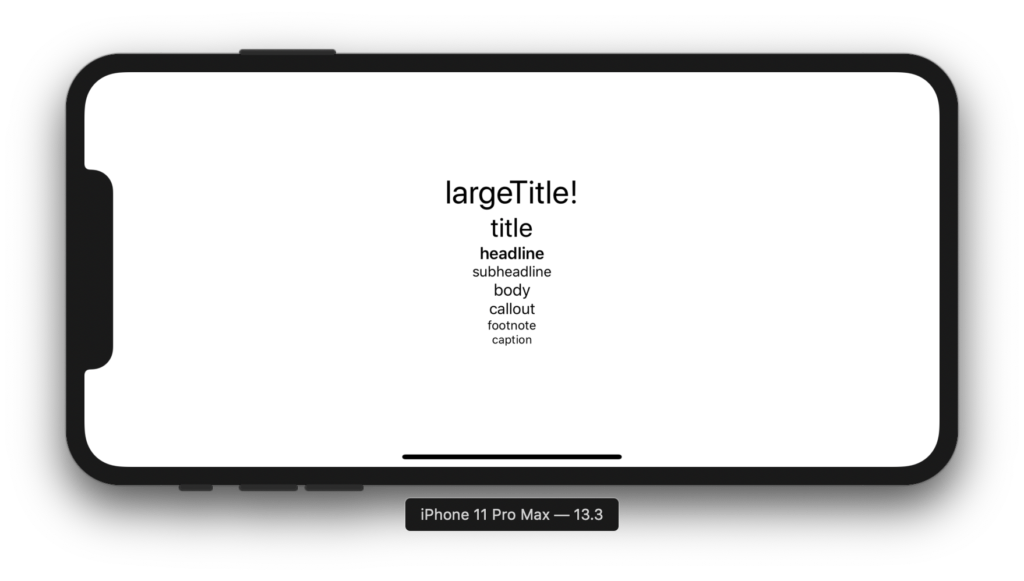
デフォルトでは、次のものが用意されています。

書き方の例
実際に定義済みのフォントサイズを使って書いてみました。
struct ContentView: View {
    var body: some View {
        VStack {
            Text("largeTitle!").font(.largeTitle)
            Text("title").font(.title)
            Text("headline").font(.headline)
            Text("subheadline").font(.subheadline)
            Text("body").font(.body)
            Text("callout").font(.callout)
            Text("footnote").font(.footnote)
            Text("caption").font(.caption)
        }
    }
}
MEMO
上記のコードに登場するVStackは中のビューを縦に並べるためのものです。
フォントの太さの変更
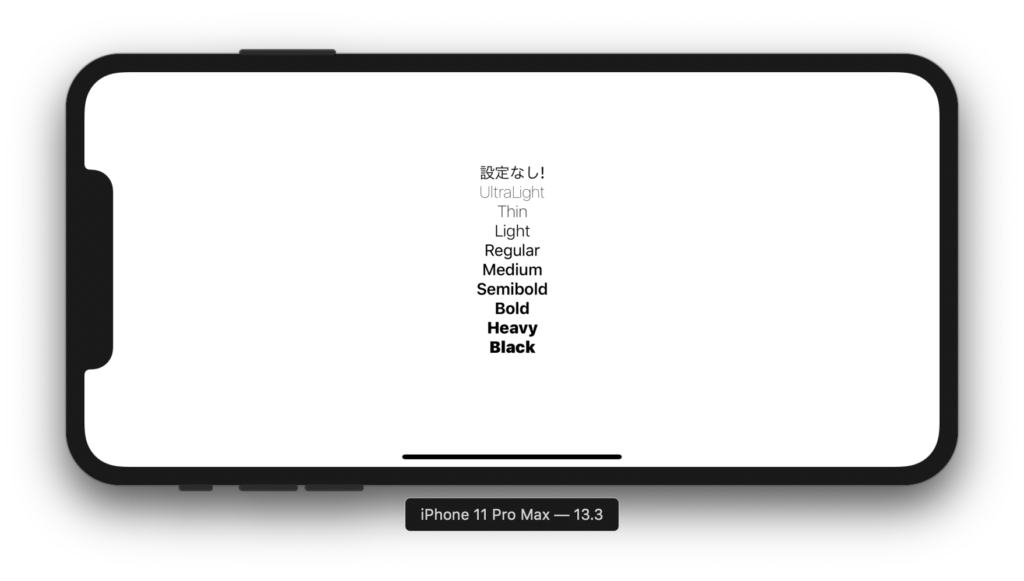
.fontWeight(.フォントの太さ)fontWeightで表示するフォントの太さを指定します。
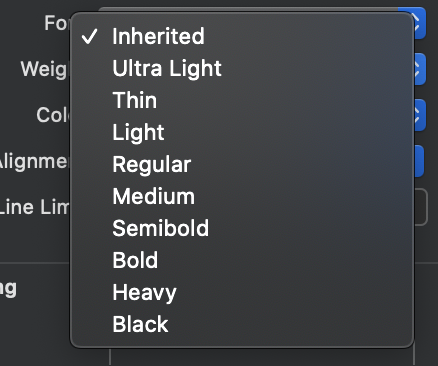
デフォルトでは、次のものが用意されています。
書き方の例
実際に定義済みのものを使って書いてみました。
struct ContentView: View {
    var body: some View {
        VStack {
            Text("設定なし!")
            Text("UltraLight").fontWeight(.ultraLight)
            Text("Thin").fontWeight(.thin)
            Text("Light").fontWeight(.light)
            Text("Regular").font(.body).fontWeight(.regular)
            Text("Medium").fontWeight(.medium)
            Text("Semibold").fontWeight(.semibold)
            Text("Bold").fontWeight(.bold)
            Text("Heavy").fontWeight(.heavy)
            Text("Black").fontWeight(.black)
        }
    }
}
フォントカラーの変更
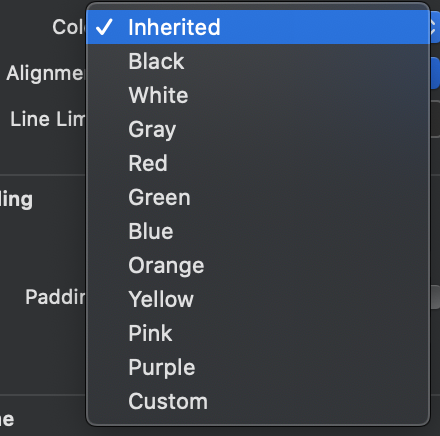
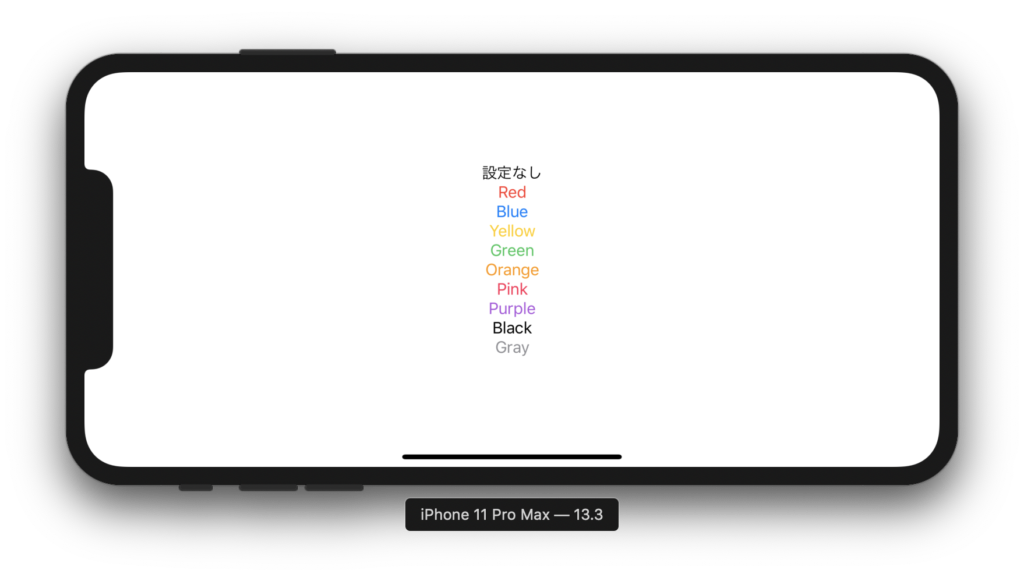
.foregroundColor(Color.カラー名)foregroundColor()で表示する文字の色を指定します。
デフォルでは次のカラーが用意されています。
書き方の例
struct ContentView: View {

    var body: some View {
        VStack {
            Text("設定なし")
            Text("Red").foregroundColor(Color.red)
            Text("Blue").foregroundColor(Color.blue)
            Text("Yellow").foregroundColor(Color.yellow)
            Text("Green").foregroundColor(Color.green)
            Text("Orange").foregroundColor(Color.orange)
            Text("Pink").foregroundColor(Color.pink)
            Text("Purple").foregroundColor(Color.purple)
            Text("Black").foregroundColor(Color.black)
            Text("Gray").foregroundColor(Color.gray)
        }
    }
}
MEMO
Colorは省略して「.gray」のように書くこともできます。
尚、カスタムカラーを使いたい場合は、次のように書いてrgbを指定してあげれば良いです。
.foregroundColor(Color(red: 1.0, green: 0.0, blue: 0.0, opacity: 1.0))※opacityは透明度のことでswiftでいうalphaに相当します。
関連記事
 【SwiftUI】Imageビューの使い方まとめ
 【SwiftUI】TextFieldビューの使い方まとめ
 【SwiftUI】Buttonビューの使い方まとめ
 【SwiftUI】Toggleの使い方まとめ!ON / OFFのスイッチを作ってみよう
