このページではiOSアプリ開発初心者向けにUIPageViewControllerの使い方を解説します。
UIPageViewControllerを使うことで、下の動画のように画面をスワイプすることで別のViewへ移動できるようになります。
実装までの流れ
- スクロールで画面遷移させたいViewControllerの準備
- UIPageViewControllerの準備
- コードを記述
STEP1. スクロールで画面遷移させたいViewControllerの準備
まずは、スクロールで表示するViewControllerをstoryboardで追加します。
今回は3つ(FirstView、SecondView、ThirdView)用意しました。
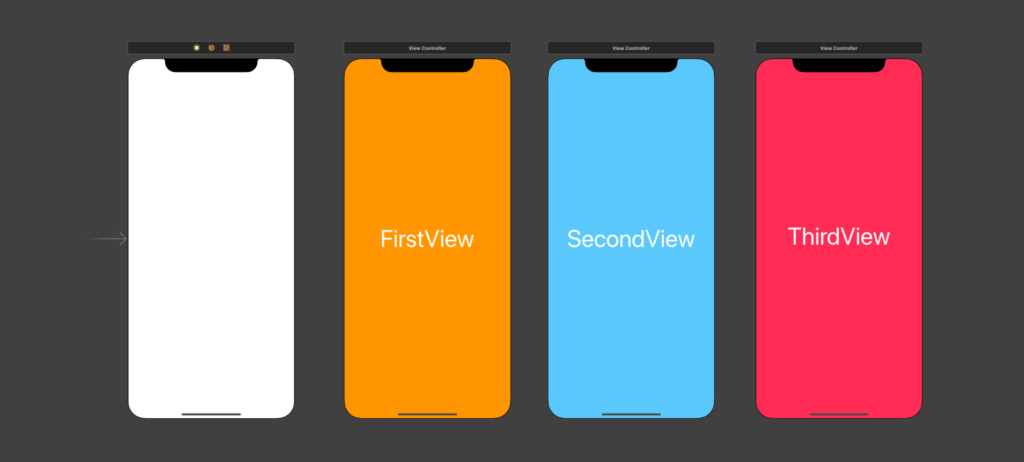
ViewControllerを追加したら、クラスファイルを作成し、それぞれのViewControllerに割り当てます。
今回はFirstViewController、SecondViewController、hirdViewControllerという名前のファイルを作成し、割り当てました。
また、この時Storyboard IDに名前は何でもいいので、一意のIDを登録しておきます。
今回はわかりやすいようにFirstView、SecondView、ThirdViewとしておきます。
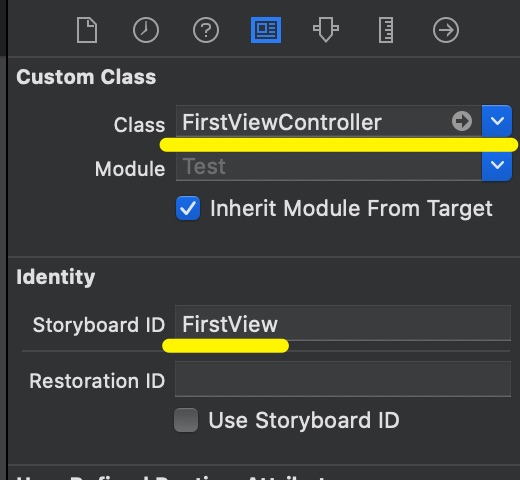
ここまでをまとめると、次のようになります。
| ViewController | Class | Storyboard ID |
| FirstView | FirstViewController | FirstView |
| SecondView | SecondViewController | SecondView |
| ThirdView | ThirdViewController | ThirdView |
STEP2. UIPageViewControllerの準備
今の段階では単にView Controllerを用意しただけですので、今度はこれらをスクロールで画面切り替えできるようにする必要があります。
その役割を担うのがUIPageViewControllerです。
今度はこちらを準備していきましょう。
まず、デフォルトで用意されているView Controllerは不要なので削除してください。
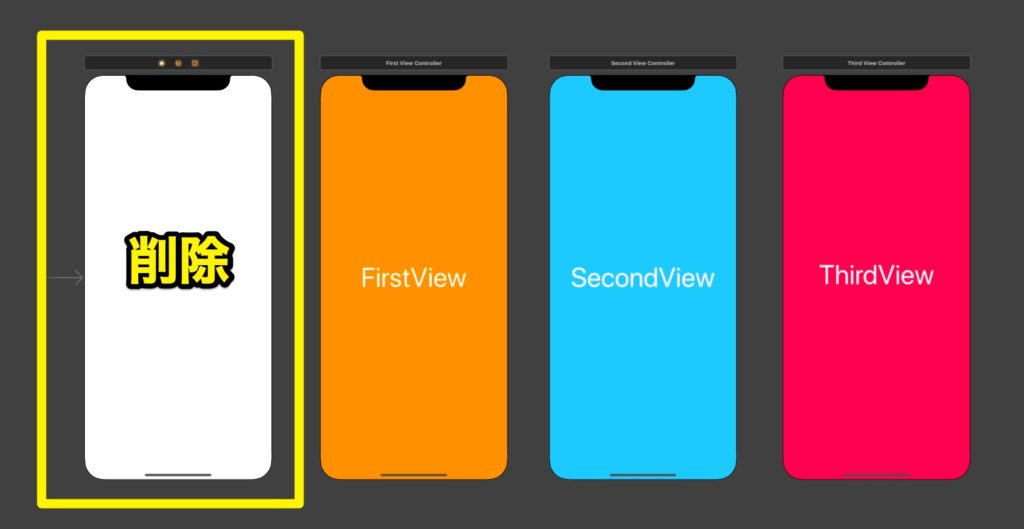
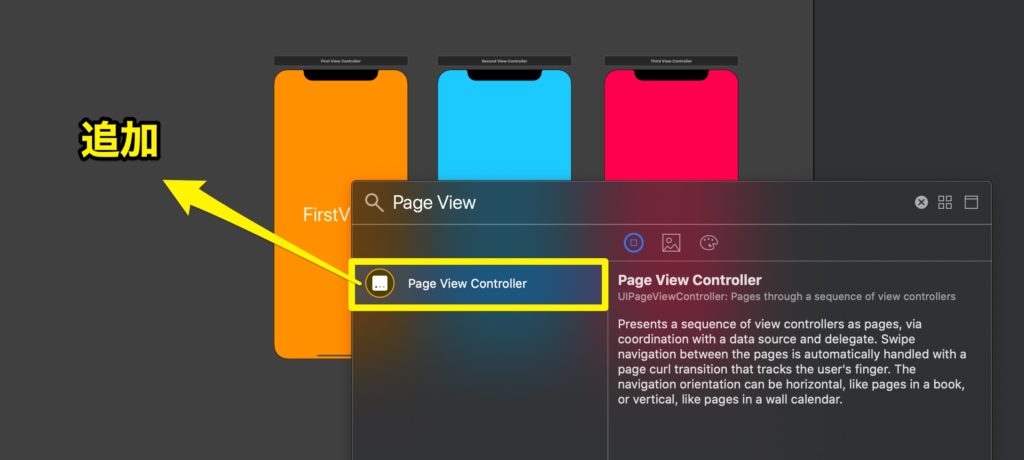
削除したら、「Page View Controller」をstoryboard上に追加します。
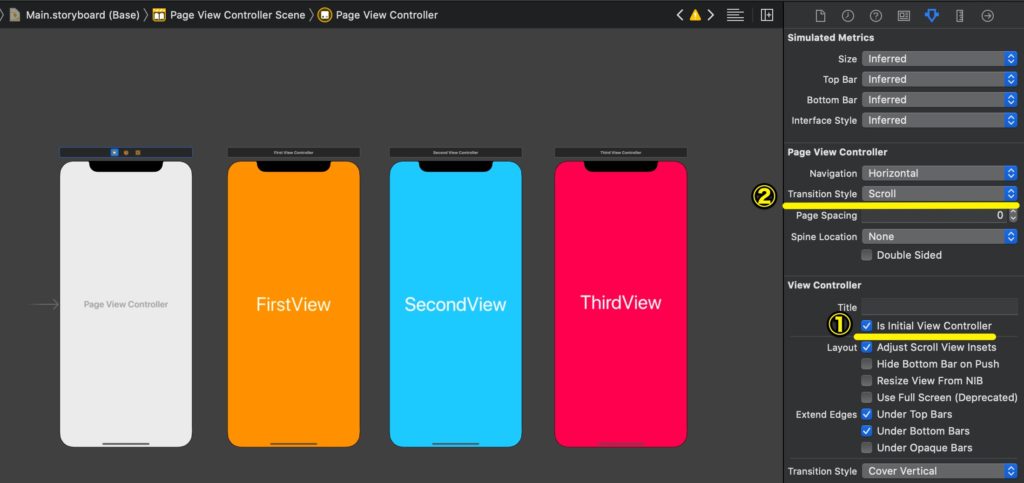
追加したPage View Controllerのis Initial View Controllerにチェックをつけ(画像の①)、Transition Styleを「Scroll」にしてください(画像の②)。
is Initial View Controllerはアプリを起動して最初に呼ばれるView Controllerですね。
先ほど、デフォルトのView Controllerを削除したあので、新しく追加したPage View Controllerを最初に呼ぶView Controllerとして設定しておきます。
STEP3. コードを記述
今の段階では、UIPageViewControllerの追加はしましたが、FirstView〜ThirdViewとの関連は何もありませんね。
そのため、これらのViewControllerを関連付けを行う必要があります。
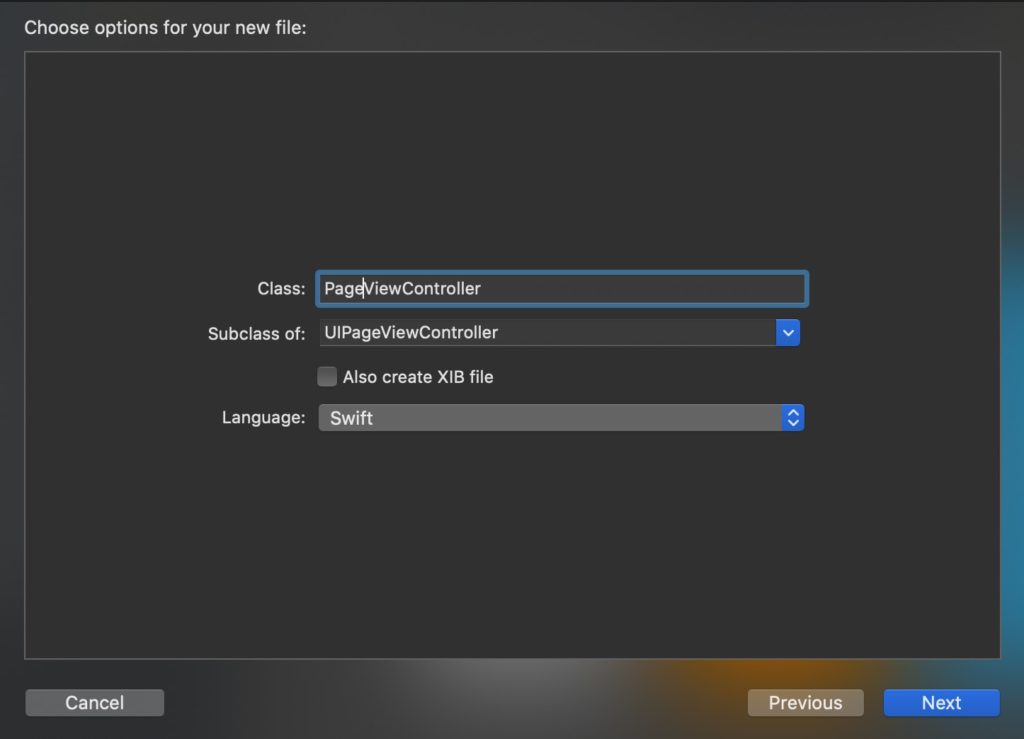
まずは、UIPageViewController用のクラスファイルを作成します。
ファイル名は今回「PageViewController」としています。
「Subclass of:」では「UIPageViewController」を選んでください。
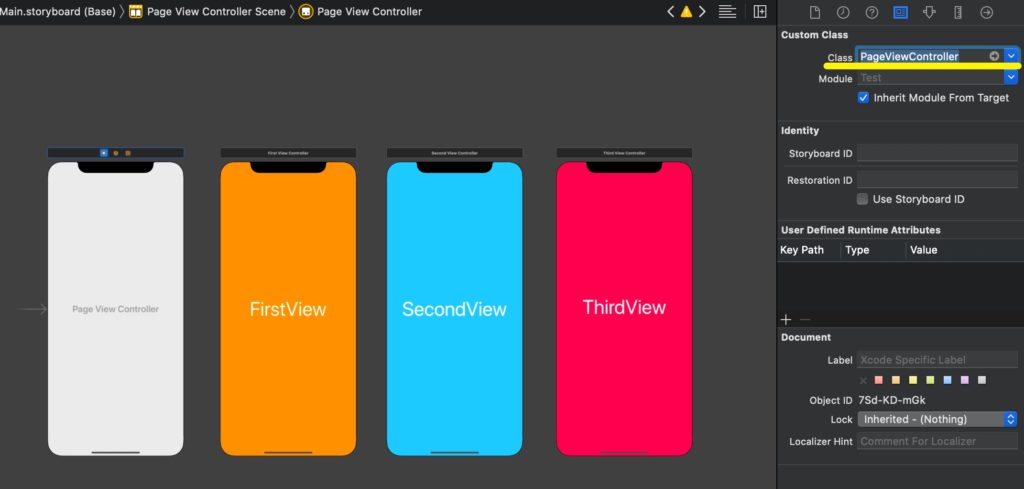
ファイルが追加できたら、先ほど追加したUIPageViewControllerにクラスファイルを割り当ててください。
最後に他のViewController(FirstView〜ThirdView)と関連付けを行うためにPageViewController.swiftに以下のコードを記述します。
import UIKit

class PageViewController: UIPageViewController {

    // ① PageView上で表示するViewControllerを管理する配列
    private var controllers: [UIViewController] = []

    override func viewDidLoad() {
        super.viewDidLoad()

        // ②初期化
        self.initPageView()
    }

    // ②初期化(PageViewで表示するViewをセット)
    func initPageView(){
        // PageViewControllerで表示するViewControllerをインスタンス化
        let firstVC = storyboard!.instantiateViewController(withIdentifier: "FirstView") as! FirstViewController
        let secondVC = storyboard!.instantiateViewController(withIdentifier: "SecondView") as! SecondViewController
        let ThirdVC = storyboard!.instantiateViewController(withIdentifier: "ThirdView") as! ThirdViewController

        // インスタンス化したViewControllerを配列に追加
        self.controllers = [ firstVC, secondVC, ThirdVC ]

        // 最初に表示するViewControllerを指定する
        setViewControllers([self.controllers[0]],
                           direction: .forward,
                           animated: true,
                           completion: nil)

        // PageViewControllerのDataSourceとの関連付け
        self.dataSource = self
    }
}

// MARK: - UIPageViewController DataSource
extension PageViewController: UIPageViewControllerDataSource {
    // スクロールするページ数
    func presentationCount(for pageViewController: UIPageViewController) -> Int {
        return self.controllers.count
    }

    // 左にスワイプした時の処理
    func pageViewController(_ pageViewController: UIPageViewController, viewControllerAfter viewController: UIViewController) -> UIViewController? {
        if let index = self.controllers.firstIndex(of: viewController),
            index < self.controllers.count - 1 {
            return self.controllers[index + 1]
        } else {
            return nil
        }
    }

    // 右にスワイプした時の処理
    func pageViewController(_ pageViewController: UIPageViewController, viewControllerBefore viewController: UIViewController) -> UIViewController? {
        if let index = self.controllers.firstIndex(of: viewController),
            index > 0 {
            return self.controllers[index - 1]
        } else {
            return nil
        }
    }
}
PageViewControllerの初期化処理「initPageView()」の中で、次のように表示するViewControllerを設定しています。
let firstVC = storyboard!.instantiateViewController(withIdentifier: "FirstView") as! FirstViewController
let secondVC = storyboard!.instantiateViewController(withIdentifier: "SecondView") as! SecondViewController
let ThirdVC = storyboard!.instantiateViewController(withIdentifier: "ThirdView") as! ThirdViewController
あなたの環境に合わせて、withIdentifierにはStoryboard IDの値を設定し、as!(ダウンキャスト)で、ViewController名を指定してください。
以上で、ビルドし動作を確認するとスワイプ で画面の切り替えができるようになります。
